Webhooks (FREE)
Webhooks are custom HTTP callbacks that you define. They are usually triggered by an event, such as pushing code to a repository or posting a comment on a blog. When the event occurs, the source app makes an HTTP request to the URI configured for the webhook. The action to take may be anything. For example, you can use webhooks to:
- Trigger continuous integration (CI) jobs, update external issue trackers, update a backup mirror, or deploy to your production server.
- Send a notification to Slack every time a job fails.
- Integrate with Twilio to be notified via SMS every time an issue is created for a specific project or group in GitLab.
- Automatically assign labels to merge requests.
You can configure your GitLab project or group to trigger a percent-encoded webhook URL when an event occurs. For example, when new code is pushed or a new issue is created. The webhook listens for specific events and GitLab sends a POST request with data to the webhook URL.
Usually, you set up your own webhook receiver to receive information from GitLab and send it to another app, according to your requirements. We have a built-in receiver for sending Slack notifications per project.
GitLab.com enforces webhook limits, including:
- The maximum number of webhooks and their size, both per project and per group.
- The number of webhook calls per minute.
Group webhooks (PREMIUM)
You can configure a group webhook, which is triggered by events that occur across all projects in the group.
Group webhooks can also be configured to listen for events that are specific to a group, including:
Configure a webhook
You can configure a webhook for a group or a project.
- In your project or group, on the left sidebar, select Settings > Webhooks.
- In URL, enter the URL of the webhook endpoint. The URL must be percent-encoded if it contains one or more special characters.
- In Secret token, enter the secret token to validate payloads.
- In the Trigger section, select the events to trigger the webhook.
- Optional. Clear the Enable SSL verification checkbox to disable SSL verification.
- Select Add webhook.
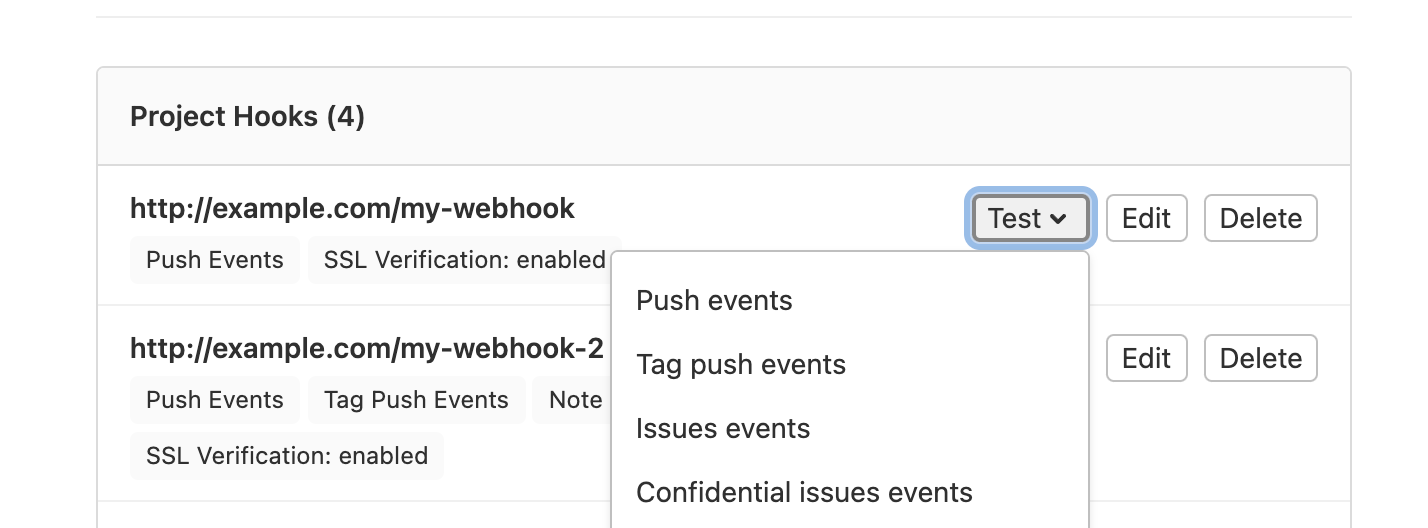
Test a webhook
You can trigger a webhook manually, to ensure it's working properly.
For example, to test push events, your project should have at least one commit. The webhook uses this commit in the webhook.
To test a webhook:
- In your project, on the left sidebar, select Settings > Webhooks.
- Scroll down to the list of configured webhooks.
- From the Test dropdown list, select the type of event to test.
Create an example webhook receiver
To test how GitLab webhooks work, you can use an echo script running in a console session. For the following script to work you must have Ruby installed.
-
Save the following file as
print_http_body.rb:require 'webrick' server = WEBrick::HTTPServer.new(:Port => ARGV.first) server.mount_proc '/' do |req, res| puts req.body end trap 'INT' do server.shutdown end server.start -
Choose an unused port (for example,
8000) and start the script:ruby print_http_body.rb 8000 -
In GitLab, add your webhook receiver as
http://my.host:8000/. -
Select Test. You should see something like this in the console:
{"before":"077a85dd266e6f3573ef7e9ef8ce3343ad659c4e","after":"95cd4a99e93bc4bbabacfa2cd10e6725b1403c60",<SNIP>}
example.com - - [14/May/2014:07:45:26 EDT] "POST / HTTP/1.1" 200 0
- -> /
NOTE: You may need to allow requests to the local network for this receiver to be added.
Validate payloads by using a secret token
You can specify a secret token to validate received payloads.
The token is sent with the hook request in the
X-Gitlab-Token HTTP header. Your webhook endpoint can check the token to verify
that the request is legitimate.
Verify an SSL certificate
By default, the SSL certificate of the webhook endpoint is verified based on an internal list of Certificate Authorities. This means the certificate cannot be self-signed.
You can turn off SSL verification in the webhook settings in your GitLab projects.
Filter push events by branch
Push events can be filtered by branch using a branch name or wildcard pattern to limit which push events are sent to your webhook endpoint. By default, all push events are sent to your webhook endpoint. You can configure branch filtering in the webhook settings in your project.
HTTP responses for your endpoint
If you are writing your own endpoint (web server) to receive GitLab webhooks, keep in mind the following:
- Your endpoint should send its HTTP response as fast as possible. If the response takes longer than the configured timeout, GitLab assumes the hook failed and retries it. To customize the timeout, see Webhook fails or multiple webhook requests are triggered.
- Your endpoint should ALWAYS return a valid HTTP response. If not, GitLab assumes the hook failed and retries it. Most HTTP libraries take care of the response for you automatically but if you are writing a low-level hook, this is important to remember.
- GitLab ignores the HTTP status code returned by your endpoint.
How image URLs are displayed in the webhook body
Relative image references are rewritten to use an absolute URL in the body of a webhook. For example, if an image, merge request, comment, or wiki page includes the following image reference:
If:
- GitLab is installed at
gitlab.example.com. - The project is at
example-group/example-project.
The reference is rewritten in the webhook body as follows:
Image URLs are not rewritten if:
- They already point to HTTP, HTTPS, or protocol-relative URLs.
- They use advanced Markdown features like link labels.
Events
For more information about supported events for Webhooks, go to Webhook events.
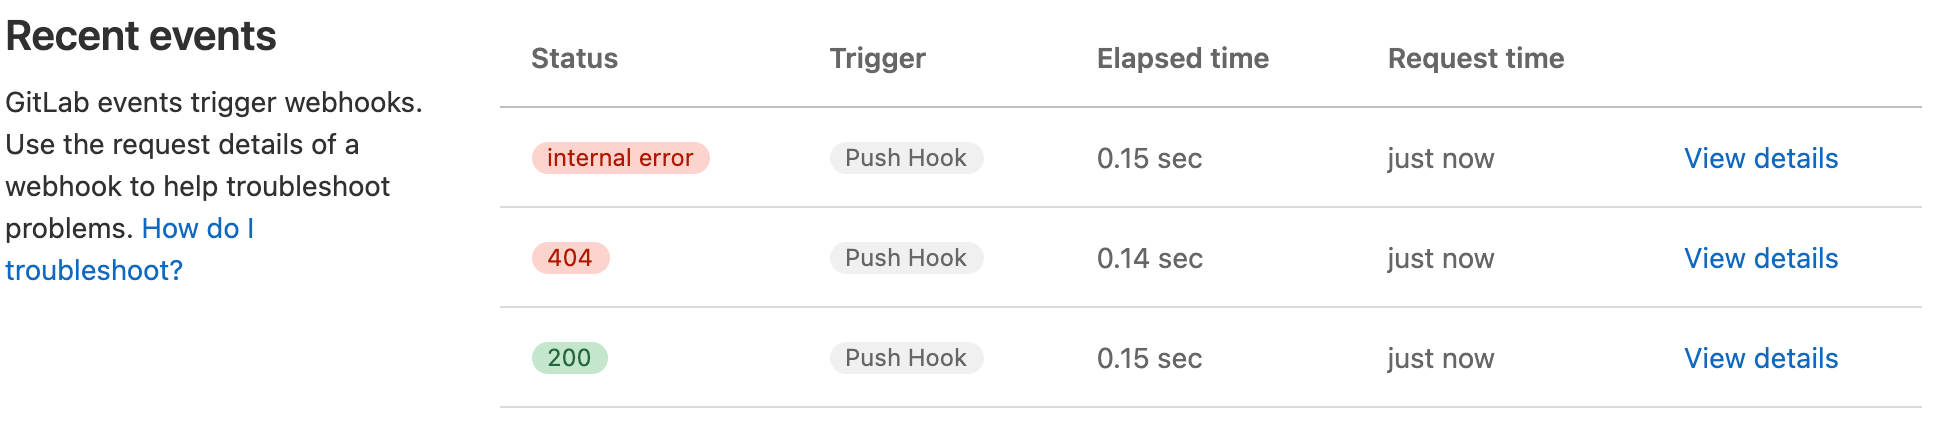
Troubleshoot webhooks
GitLab records the history of each webhook request. You can view requests made in the last 2 days in the Recent events table.
To view the table:
- In your project, on the left sidebar, select Settings > Webhooks.
- Scroll down to the webhooks.
- Select Edit for the webhook you want to view.
The table includes the following details about each request:
- HTTP status code (green for
200-299codes, red for the others, andinternal errorfor failed deliveries) - Triggered event
- Elapsed time of the request
- Relative time for when the request was made
NOTE: The Recent events table is unavailable for group-level webhooks. For more information, read issue #325642.
Each webhook event has a corresponding Details page. This page details the data that GitLab sent (request headers and body) and received (response headers and body). To view the Details page, select View details for the webhook event.
To repeat the delivery with the same data, select Resend Request.
NOTE: If you update the URL or secret token of the webhook, data is delivered to the new address.
Webhook fails or multiple webhook requests are triggered
When GitLab sends a webhook, it expects a response in 10 seconds by default. If the endpoint doesn't send an HTTP response in those 10 seconds, GitLab may assume the webhook failed and retry it.
If your webhooks are failing or you are receiving multiple requests,
you can try changing the default timeout value.
In your /etc/gitlab/gitlab.rb file, uncomment or add the following setting:
gitlab_rails['webhook_timeout'] = 10Unable to get local issuer certificate
When SSL verification is enabled, you might get an error that GitLab cannot verify the SSL certificate of the webhook endpoint. Typically, this error occurs because the root certificate isn't issued by a trusted certification authority as determined by CAcert.org.
If that is not the case, consider using SSL Checker to identify faults. Missing intermediate certificates are common causes of verification failure.